 While Apple released a new operating system and two new phones in 2013, you may still not be impressed enough to stay with your iPhone. But what about all of your personal data–your contacts, calendar, photos and apps? Don’t worry. We’ve put together everything you need to know to make the transition from iOS to Android hassle-free.
Back up your iPhone
The first step in backing up your iPhone is to create a Google account if you don’t already have one. Not only will you use the Google account to download apps on your Android phone, but having one will also help transfer your data from your iPhone to your Android device. Google’s built-in services are the easiest way to transfer your calendars, for example, to your new device.
1. Moving your Contacts
The easiest way to transfer your iPhone contacts to Android is My Contacts Backup, an iOS app that will back up your contacts in one file (file extension .vcf), which you can then email to yourself. Simply open the app on your iPhone, then click Back Up. Once it finishes, click Email and send it to your Gmail address (which you should have when you created a Google account).
Open the email on your Android phone (check the spam folder if you cannot find it), and click on the attachment to open it. It might ask you which app to use to open the .vcf file; if so, choose Contacts. Your Android device will then import all of your contacts automatically.
 2. Moving your Calendars
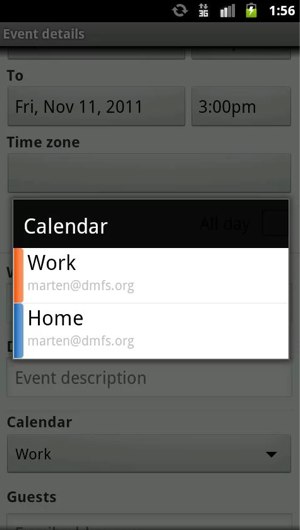
The Android app SmoothSync is your best bet for getting your iPhone calendars onto your Android phone. Download the app on your Android device ($3, but it’s worth it), open the app, log in with your Apple ID and choose the calendars you want to sync with your Android device. SmoothSync will take care of the rest. Your iPhone calendars will be synced with the calendar on your Android device.
3. Moving your Music
When it comes to moving music, the hassle-free Android app Google Play Music Manager is by far the most reliable. If the music on your iPhone is synced with iTunes on your computer, Music Manager makes your move to Android very easy. It can transfer up to 20,000 songs from your iTunes library to your Android device and the Google Play Music app allows you to play those songs on your Android.
Simply download and install the Music Manager on your computer from Google, click on the Google Play Music Manager icon in your system tray (PC) or menu bar (Mac) and hit Upload. The Music from your iTunes library will be uploaded into your Google Music library.
 4. Moving your Photos and Videos
You’ll find a wide range of viable options for transferring photos and videos, including services from your carrier, a USB cable and a computer or just using the most popular cloud storage services available.
Carrier options
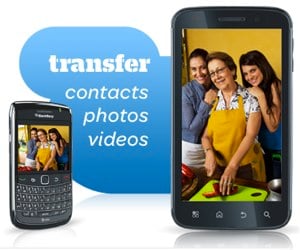
AT&T offers AT&T Mobile Transfer transfers up to 2GB of photos, videos and contacts to your new Android device. AT&T also offers AT&T Locker, which matches Verizon Wireless’ Verizon Cloud in allowing you to access (not download) your photos, videos, music, documents and text messages on your iPhone, Android device or computer. AT&T Locker gives you 5GB of cloud storage for free, while Verizon Cloud only allows 500MB of free storage. You can purchase additional storage starting at $2.99 a month for 25GB.
T-Mobile and Sprint do not offer any viable options to transfer data from an iPhone to an Android device.
USB option
Although the carrier option may be convenient, there are many free and arguably better services available that can complete the same tasks without the added costs.
Try transferring your photos and videos via USB with your computer. Plug in your iPhone to your PC and select Import Pictures and Videos to upload automatically, or choose Open Device to view and select the photos and videos individually, which you’ll find in the Internal Storage/DCIM folder. If you have a Mac, the import box should pop up automatically, and you can select the photos and videos from there.
You can also download the Android File Transfer application from Google, which makes the process of moving the photos and videos from your Mac to your Android device easier. Once you receive your Android device, plug it into your PC or Mac, then drag and drop the files into the appropriate folder (pictures in the picture folder, videos in the video folder) of your Android device.
Dropbox option
The easiest way by far to move photos and videos to your Android device is the popular cloud storage service Dropbox. Simply download Dropbox from iTunes, and create an account (or log in if you already have one). Click on the menu button at the top of your screen, and select Upload. Go through your photos and videos and upload some or all of your photos. Once you have your Android device, go to Google Playand download the Dropbox app. Log in on that app and then you can download the files you uploaded on your iPhone.
Set up your Android phone
 After backing up your iPhone data, it’s time to set up your new Android device.
When you first turn on your new device, the first thing you’ll need to do is sign in with the Google Account you previously created. Though some Android phones may have different setup screens (some of which may take you through the process of adding your Google account, other social networks like Facebook and Twitter and even email when you first turn them on), the settings are pretty much the same across the devices.
1. Sign in with your Google Account
Go to Settings, find Accounts, and click Add Account. The next screen gives you options to add an account from different services. Click on the Google option, and tap Existing. Sign in with your Google Account email and password. Your contacts, calendars, music (if you used Google Play Music) and Gmail will all automatically be added to your device.
Most Android phone manufacturers prompt you to create an account with them, which can make it easier to transfer your information if you purchase another Android device from the same manufacturer. Even if you’re not sure you’ll stick with the same manufacturer for your next smartphone, it wouldn’t hurt to create an account.
 2. Set up automatic back up
When you log in with your Google account, Google will ask you if would like it to back up your device. Answer yes. Even if you created an account with the device manufacturer, having a second backup is always wise — and if you do switch to a different phone, a Google backup can make setting up your phone easier. Keep in mind that Google stores your Wi-Fi login information with that backup. While some people may be adverse to that, it isn’t as bad as many make it seem.
Some other apps may offer to back up the photos and videos on your device, but it may not be wise to use them, depending on how many photos and videos you take. Apps like Google+, Dropbox and Flickr ask if you would like to back up all of your photos and videos to their respective services. But depending on your available storage with the service, it may not be the right move in the long run. Google+ comes with 15GB of storage split with your Gmail and Google Drive; Dropbox starts off with 2GB; and Flickr offers 1TB of storage.
If you’re an above-average digital documenter, you will quickly run through your storage space with most services. However, if you do want to use a third-party service to back up your photos and videos, Flickr is your best bet, as it gives out 1TB of storage to every user.
3. Turn on malicious app scanning service
In Google Settings, an app that comes preinstalled on just about every Android phone out of the box, you’ll find a feature called Verify apps that allows Google to scan apps downloaded from sources other than Google Play for malicious content. Turn it on.
4. Enable location access
There is also a location tab in Google Settings where you can turn on Access Location. This allows Google to use your phone’s location when it is on. This can be beneficial for features like Google Now, which learns as you use it and can give you information like how long it will take to get home from your current location, taking into account traffic or the weather in your area. Without the Access location setting on, these features will not work as well.
5. Two options to leave off
For most users, settings like NFC and Bluetooth should be in the off position if you are not using them. Leaving them on could cause your battery to drain faster than normal.






No Comments